Heat Transfer Vinyl T-Shirt

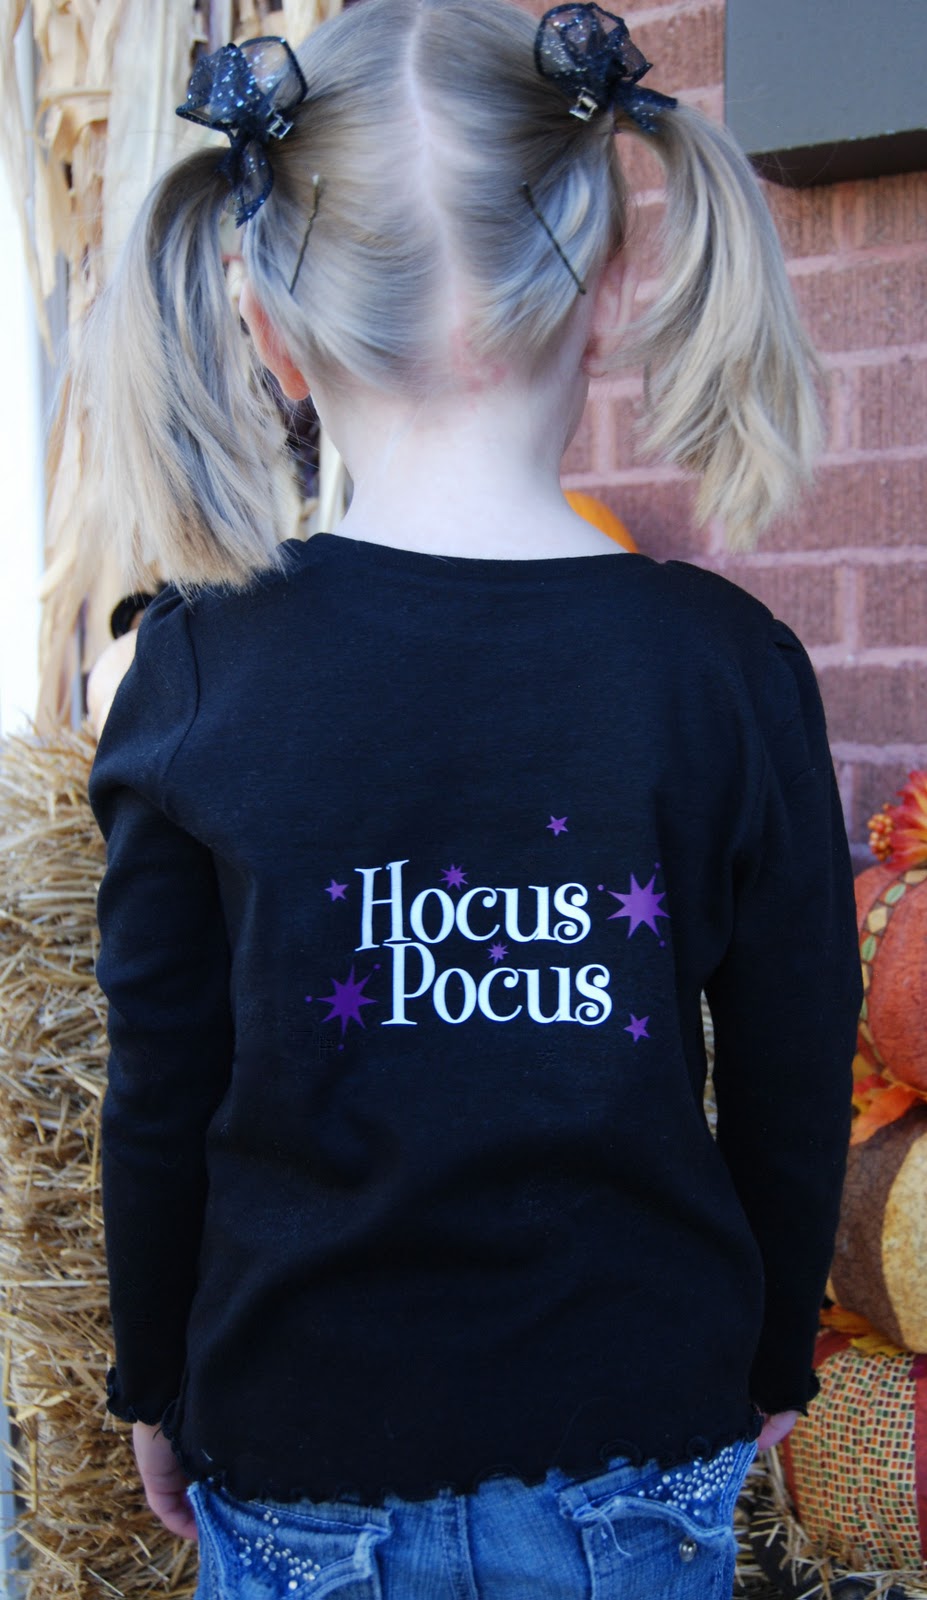
All month, I’ve wanted to make a Halloween shirt using heat transfer vinyl. But, of course, I waited until the very end to actually do it So, here is one very last minute project to wrap up the Halloween season.
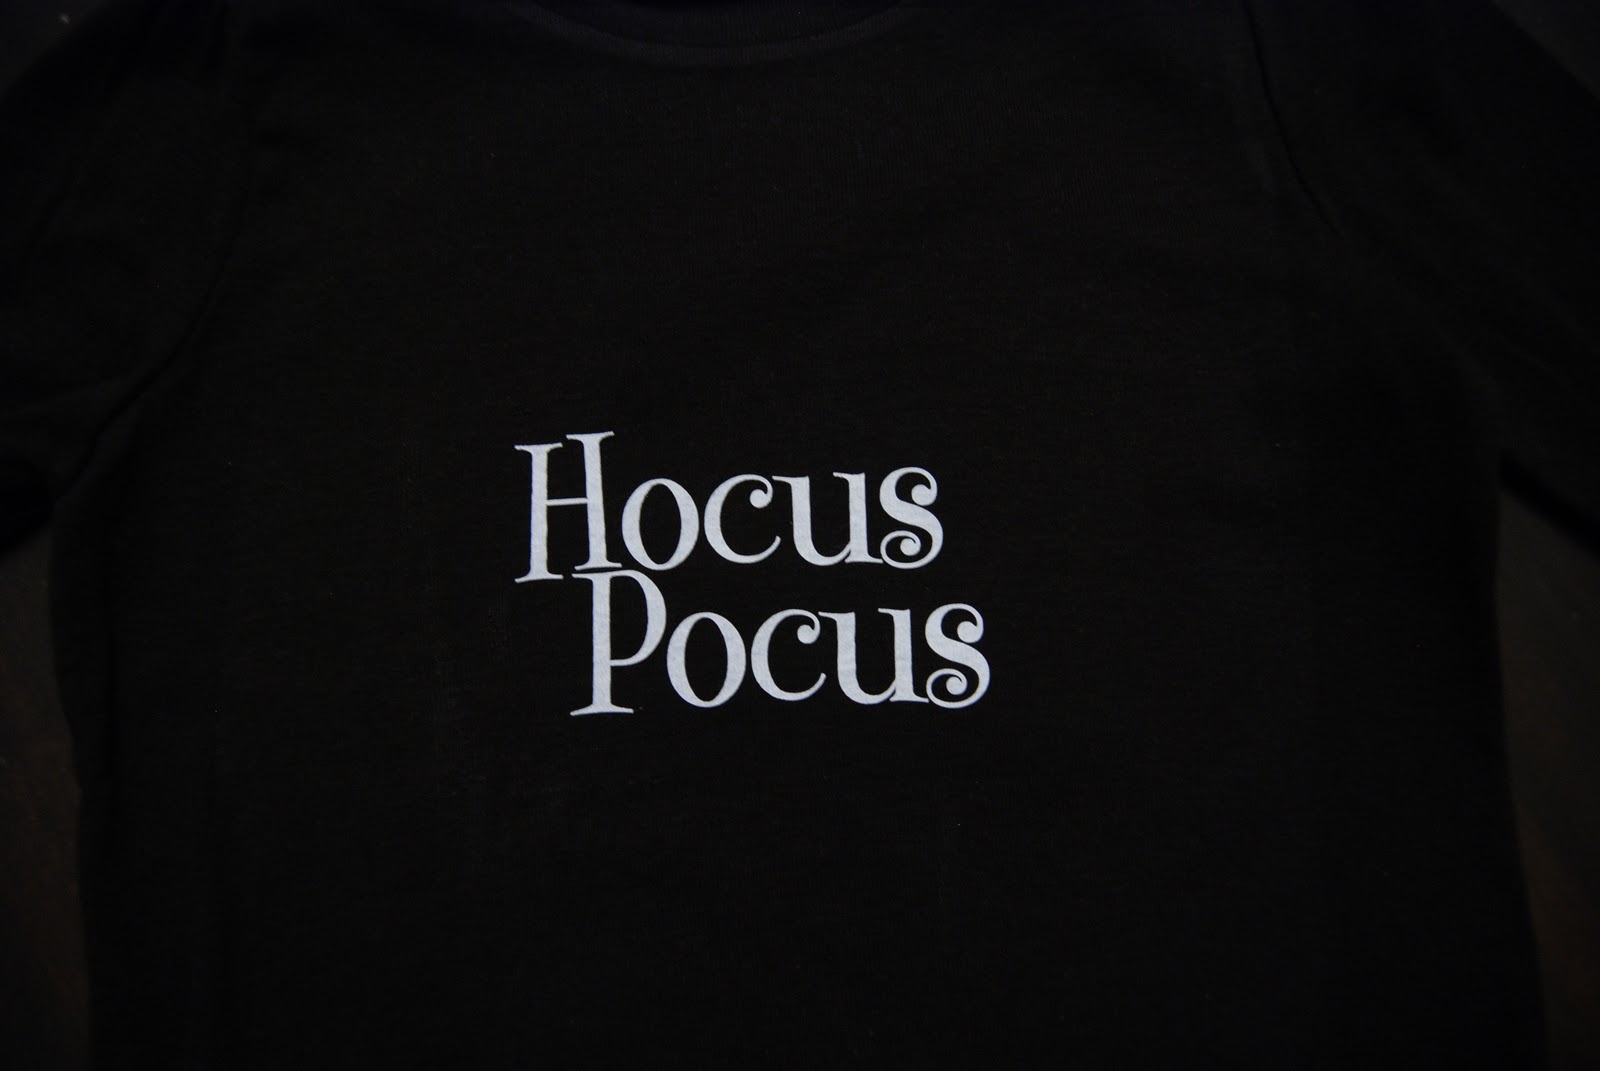
For this shirt, I used two colors of vinyl.
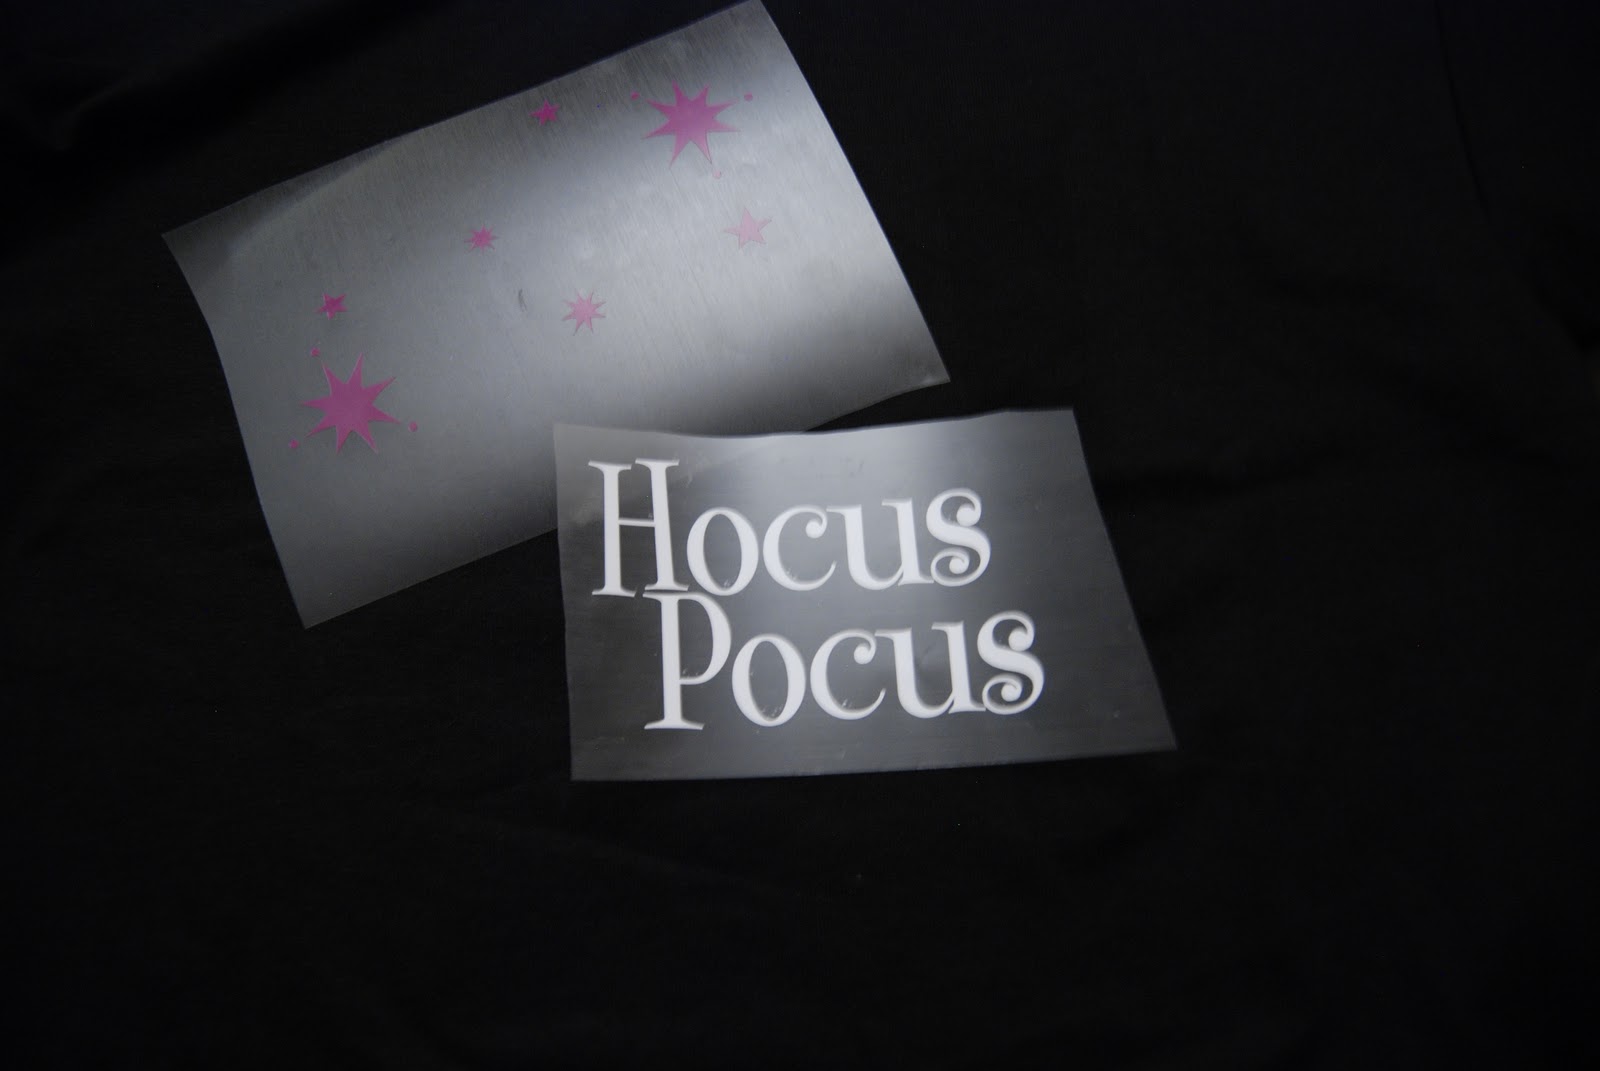
I ironed on the first color and removed the backing.
Then, added the second color.
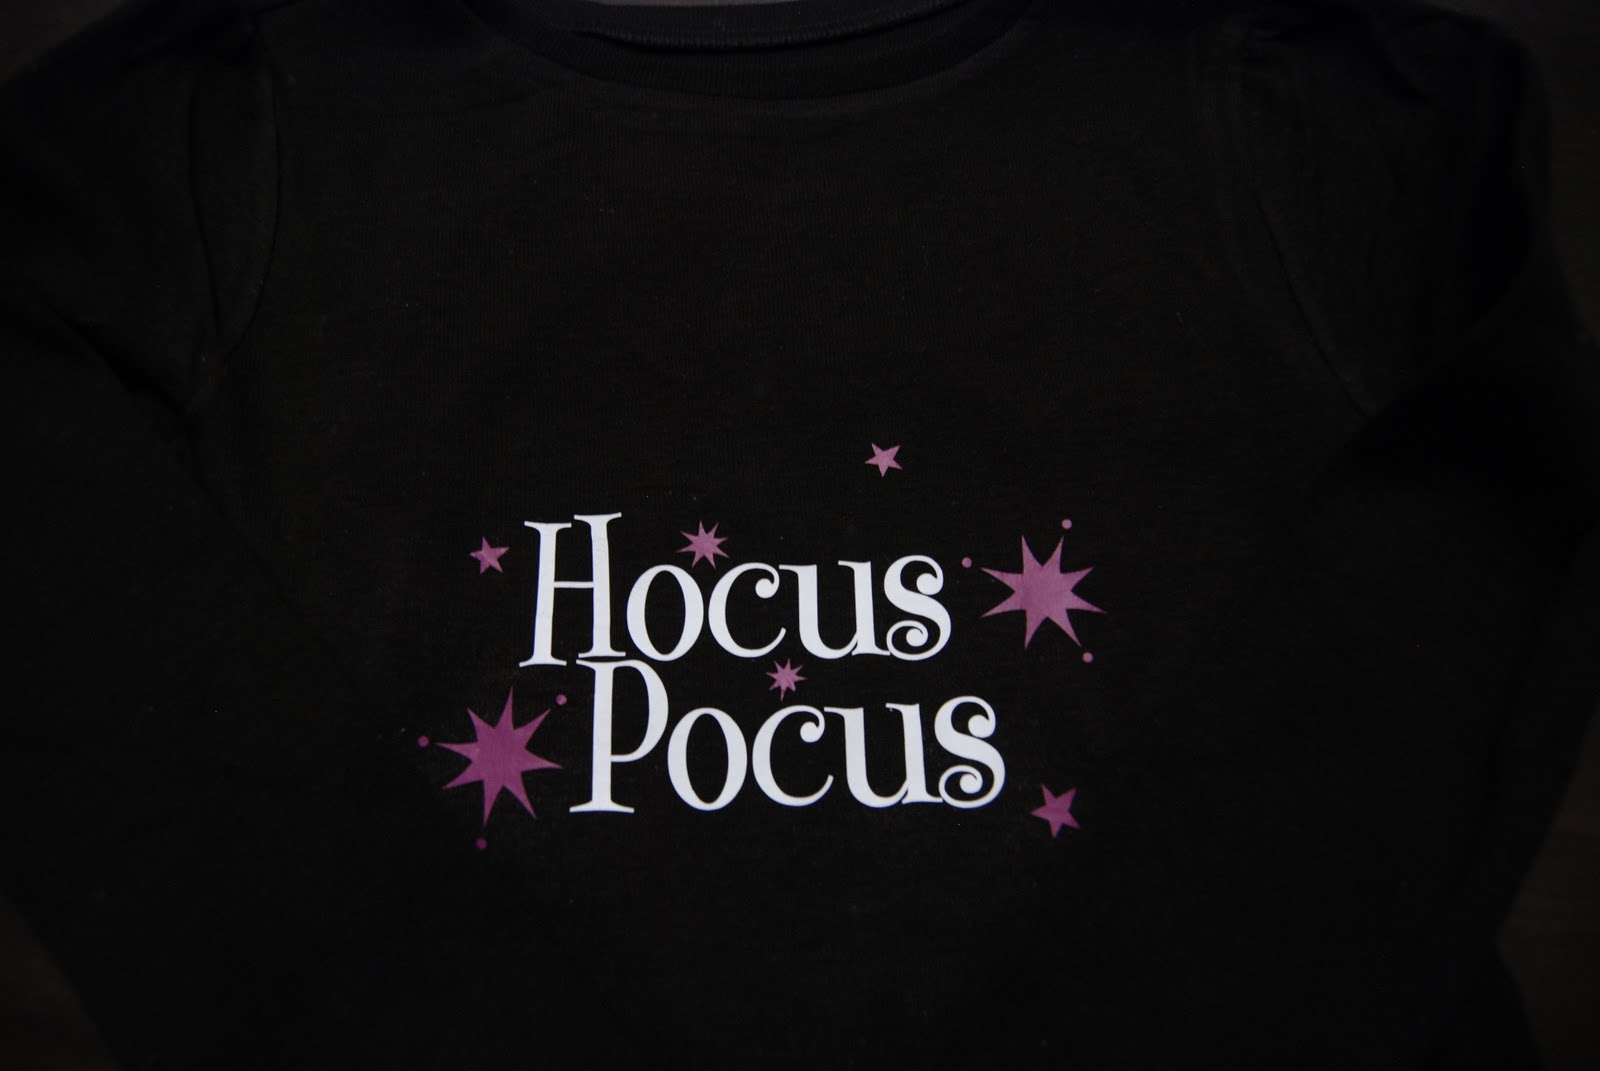
The shirt I used was pretty much ruined on the front. It had a bunch of tiny holes and some paint from another project. So, I cut out a big star and a few smaller star busts to cover everything up.
And made one little girl very happy this morning!
Happy Halloween!

Candy Corn Mug

Here is a cute and easy last minute Halloween project. It was so quick, I was able to put it together this afternoon during an extra short naptime!
 I started with a cute mug from Dollar Tree and added my vinyl. Since it was a 3-color design, I used registration marks (x’s) to line everything up (click here for the full tutorial).
 Then, I gave it a few coats of frosted glass spray.
 And, of course, I added some yummy candy corn.
 Wrap it up in some cellophane.
 and snap a few pictures just before the kiddies get home from school and wake the sleeping baby!

This would make a great gift for a friend, neighbor, teacher, anyone. Happy Halloween!
Be sure to check out these great linky parties:
Monday Amaze Me Mon, Craftastic Mon, Craft-O-Manic Mon, Homemaker Mon, Inspire Me Mon, Link Party Mon, Mad Skills, Mad Skills Mon, Made By You Mon, Made With Love Mon, Make Something Mon, Making Mon Marvelous, Making the World Cuter, Market Yourself Mon, Marvelous Mess Mon, Masterpiece Mon, Metamorphosis Mon, Motivate Me Mon, Blog Party, Project Parade, Share Mon, Thrifty Décor Chick, Unwasted Homemaking, Craft Catwalk, Craftaholics Anonyomous Tuesday All Thingz Related, Anti Procrastination Tues, Get Your Craft On, Handmade Tues, Home Stories A to Z, It’s Sew Fun, maze Me August, Nifty Thrifty Tues, Power Of Paint, Show Me What You Got, Sizzle into Summer, Take A Look Tues, Teriffic Under Ten Tues, Time To Shine, Wednesday Anything Goes, DIY Under $5, Hoo’s Got Talent?, Idea Sharing Wed, Linkin’ with Luna, Look What I Made, Penny Pinching Party, Primp Your Stuff Wed, Show And Share, Show And Tell, We Did It Wed, What I Made Wed, What I Whipped Up Wedn, What’s Up Wed, Whatever Goes Wed, Wicked Awesome Wed, Wow Me Wed, Wow Me Wed, Thursday A Crafty Soiree, Almost Fri Flaunts, Catch A Glimpse Thur, Commercial Break Thursday, Get Your Brag On, Hookin’ Up, Share Awesomness Thur, Show Off Your Stuff, Strut Your Stuff ThurCatch as Catch Can, Transformation Thur, Under $100 Linky Party, Friday Bacon Time, Delicate Construction, Fabulous Fri, Fantabulous Fri, Feature Your Sassy Sites, Feature Yourself  Fri, Flaunt It FriFree For All Fri, Fri Favorites, Fri Link Party, Frugal Fri, Frugalicious Fri, Hodgepodge Fri, I’m Lovin’ It Fri, Inspiration Fri, Lovely Crafty Weekend, Remodelaholic Fri, Show and Share Day, Scissors & Spatulas, Weekend Wander, Weekend Wrap-Up, Whatcha Got Weekend, Saturday Check Me Out Sat, Sat is Crafty Day, Sat Nite Special, Sat Spotlight, Show & Tell Sat, Summer Lovin’ Sat SoireeSunday Just Something I Whipped Up, Nifty Thrifty SunSister Sister Sun, Sun Showcase, Sun Scoop, Think Pink Sun, You’re So Creative

Hammered Copper Witch Hat (sort-of)

One day, when I have extra time (ha) and lots of extra money (ha, ha), I would love to learn how to do metal work. But, until that day comes, I thought I’d get creative and “make” my own metal work!

I started by tracing my templates in reverse on cardstock. It doesn’t matter if it is printed or solid, it’s going to be painted.
 I found this tool with a ball on top (it’s actually for fondant) and started making indents all over the paper. It is best to put the paper on something soft like a towel or carpet. I did this to try and create a hammered look.
I cut out my shapes and painted several light coats of Krylon Fusion for Plastic Hammered Copper Finish. Paint on the opposite side of the trace marks. See all my indents hammer marks?
Then, I shaped the paper and added some cording that I painted in the same color. I did not attach the cone of the hat to the brim because I wanted to add some candles. Since it is paper, I obviously could not use the real thing. Instead, I used some battery operated candles to light it up.
 
I think it turned out pretty good for my first attempt. I’ve already got lots of ideas for other things to try with this paint. Plus, it comes in four different finishes…oh, the possibilites!
Linking to these great parties:
Tip Junkie handmade projectsThe Shabby NestUndertheTableandDreamingPhotobucket 
Monday Amaze Me Mon, Craftastic Mon, Craft-O-Manic Mon, Homemaker Mon, Inspire Me Mon, Link Party Mon, Mad Skills, Mad Skills Mon, Made By You Mon, Made With Love Mon, Make Something Mon, Making Mon Marvelous, Making the World Cuter, Market Yourself Mon, Marvelous Mess Mon, Masterpiece Mon, Metamorphosis Mon, Motivate Me Mon, Blog Party, Project Parade, Share Mon, Thrifty Décor Chick, Unwasted Homemaking, Craft Catwalk, Craftaholics Anonyomous Tuesday All Thingz Related, Anti Procrastination Tues, Get Your Craft On, Handmade Tues, Home Stories A to Z, It’s Sew Fun, maze Me August, Power Of Paint, Show Me What You Got, Sizzle into Summer, Take A Look Tues, Teriffic Under Ten Tues, Time To Shine,Tip Me Tuesday, Too Cute Tues, Tues Time Out, Tuesday Trash 2 Treasure, Tuesday’s Treasures, Tutorial Tuesday, Who’s Got Glam? Wednesday Anything Goes, DIY Under $5, Hoo’s Got Talent?, Idea Sharing Wed, Linkin’ with Luna, Look What I Made, Penny Pinching Party, Primp Your Stuff Wed, Show And Share, Show And Tell, We Did It Wed, What I Made Wed, What I Whipped Up Wed, What’s Up Wed, Whatever Goes Wed, Wicked Awesome Wed, Wow Me Wed, Wow Me Wed, Thursday A Crafty Soiree, Creative Juice, Catch A Glimpse Thur, Commercial Break Thursday, Get Your Brag On, Hookin’ UpShare Awesomness Thur, Show Off Your Stuff, Strut Your Stuff ThurCatch as Catch Can, Transformation Thur, Under $100 Linky Party, Friday Delicate Construction, Fantabulous Fri, Feature Your Sassy Sites, Feature Yourself  Fri, Flaunt It FriFree For All Fri, Fri Favorites, Fri Link Party, Frugal Fri, Frugalicious Fri, I’m Lovin’ It Fri, Inspiration Fri, Lovely Crafty Weekend, Remodelaholic Fri, Weekend Wander, Weekend Wrap-Up, Whatcha Got Weekend, Saturday Sat is Crafty Day, Sat Nite Special, Sat Spotlight, Show & Tell Sat, Strut Your Stuff, Summer Lovin’ Sat Soiree, Sunday Just Something I Whipped Up, Nifty Thrifty SunSister Sister Sun, Sun Showcase, Sun Scoop, Think Pink Sun, You’re So Creative

Easy Fuzzy Spider

Last week, I was out looking at some Halloween costumes and accessories. I found a small black boa and thought it would make a perfect fuzzy spider.

I made two balls out of tin foil (one was smaller than the other). I wrapped the boa around each ball and glued it in place with hot glue. 
 I attached some legs I made out of black pipe cleaners.
 I trimmed the feathers of the smaller ball and glued on some eyes. Then, I glued the two balls together and he was done. I thought he looked cute sitting on top of a little pumpkin.

Hooded Towel

I’m taking a break from all of this Halloween crafting to show you a gift I made recently for a friend. She had her 6th baby last month and I wanted to give her something other than clothes or toys (and by number 6, what do you really need, anyway?). I had pinned this darling hooded towel tutorial and thought it would make a great gift.

I love these towels and since both of my girls asked if it was for them, I might be making several more.

The tutorial is easy to follow and the process is pretty simple. She even gives step-by-step folding instructions. So cute!

Halloween Charger

I’ve said it before and I’ll say it again (and probably again), I love vinyl! There are so many things you can do with it. Here is another fast and easy project I made with vinyl and a plastic charger.

I got the charger from Michaels. It was on sale and I’m thinking I should probably get some more.

In my vinyl software program, I drew a circle and then copied, pasted, mirrored, and rotated these ghosts until they were all around the circle.
 I did the same thing with tiny little bats. I also added the Happy Halloween in the center. And that’s it.
These would be cute hanging on the wall, on a plate stand, or filled up with some yummy treats to share!
So quick and simple and can be done for any holiday, season, or occasion.

Halloween Road Sign

I finished up this project a few days ago and I am lovin’ the way it turned out. Plus, it was made from pallet wood, so it was free!
I brainstormed and searched online to come up with the street names (aren’t they clever?). I cut my pallet wood in half and cut an arrow shape on one end. I didn’t mark or measure because I wanted them to all look different. I painted one coat on the front and left the edges to finish later.  
I made some stencils with my vinyl cutter,
painted,
removed,
and lightly sanded.
I laid out them out on a painted 2″ x 4″, until I got them spaced and angled the way I liked. I nailed them on with some old rusty nails. I then took some very watered down black paint and quickly painted over the front and edges and wiped most of it off with a wet paper towel. I took it outside, stuck it in the dirt, and piled some rocks around it.
 
 
I love the colors and the fun Halloween fonts. This project was fun and so easy, when Halloween is over, I’m gonna make one for fall!
Linking to these great parties:
Tip Junkie handmade projectsThe Shabby NestUndertheTableandDreamingPhotobucket 
Monday Amaze Me Mon, Craftastic Mon, Craft-O-Manic Mon, Homemaker Mon, Inspire Me Mon, Link Party Mon, Mad Skills, Mad Skills Mon, Made By You Mon, Made With Love Mon, Make Something Mon, Making Mon Marvelous, Making the World Cuter, Market Yourself Mon, Marvelous Mess Mon, Masterpiece Mon, Metamorphosis Mon, Motivate Me Mon, Blog Party, Project Parade, Share Mon, Thrifty Décor Chick, Unwasted Homemaking, Craft Catwalk, Craftaholics Anonyomous Tuesday All Thingz Related, Anti Procrastination Tues, Get Your Craft On, Handmade Tues, Home Stories A to Z, It’s Sew Fun, maze Me August, Power Of Paint, Show Me What You Got, Sizzle into Summer, Take A Look Tues, Teriffic Under Ten Tues, Time To Shine,Tip Me Tuesday, Too Cute Tues, Tues Time Out, Tuesday Trash 2 Treasure, Tuesday’s Treasures, Tutorial Tuesday, Who’s Got Glam? Wednesday Anything Goes, DIY Under $5, Hoo’s Got Talent?, Idea Sharing Wed, Linkin’ with Luna, Look What I Made, Penny Pinching Party, Primp Your Stuff Wed, Show And Share, Show And Tell, We Did It Wed, What I Made Wed, What I Whipped Up Wed, What’s Up Wed, Whatever Goes Wed, Wicked Awesome Wed, Wow Me Wed, Wow Me Wed, Thursday A Crafty Soiree, Creative Juice, Catch A Glimpse Thur, Commercial Break Thursday, Get Your Brag On, Hookin’ UpShare Awesomness Thur, Show Off Your Stuff, Strut Your Stuff ThurCatch as Catch Can, Transformation Thur, Under $100 Linky Party, Friday Delicate Construction, Fantabulous Fri, Feature Your Sassy Sites, Feature Yourself  Fri, Flaunt It FriFree For All Fri, Fri Favorites, Fri Link Party, Frugal Fri, Frugalicious Fri, I’m Lovin’ It Fri, Inspiration Fri, Lovely Crafty Weekend, Remodelaholic Fri, Weekend Wander, Weekend Wrap-Up, Whatcha Got Weekend, Saturday Sat is Crafty Day, Sat Nite Special, Sat Spotlight, Show & Tell Sat, Strut Your Stuff, Summer Lovin’ Sat Soiree, Sunday Just Something I Whipped Up, Nifty Thrifty SunSister Sister Sun, Sun Showcase, Sun Scoop, Think Pink Sun, You’re So Creative

Tin Can Mummy Family

At our house we go through a lot of canned foods. My kids love canned fruit and I love to serve green beans and corn with many meals, so we always have an abundant supply of empty cans. I saw some really cute crafts made with tin cans, but with a shortage of time, I decided to go with something fast and easy.

I used crepe paper, hot glue and some wiggle eyes and these guys were done in less than 10 minutes. These were so easy that even my kids can make some.

Paper Mache Pumpkin Topiary

I first saw pumpkin topiaries just after Halloween 2009. I knew right away that I wanted to make them the next year for our front porch. I had no idea the foam pumpkins were as pricey as they are (even with sales or discounts, 6 of them really added up). I never found pots or urns within my budget, either. So, I put that project on hold…at least for another year. Then, back in June, I found these awesome urns for $3.00, at the grocery store! Suddenly, pumpkin topiaries were in my head again and I began thinking of a cheap alternative to the foam pumpkins. Here is my finished topiary. I made with the pumpkins with newspaper, flour, and water (aka paper mache).
 This is how I made the pumpkins (except I used newspaper as filler instead of plastic bags).  It was time consuming, but I figured it was worth it (at least that’s what I kept telling myself). Mine didn’t turn out smooth enough to paint, so I decided to follow the trend and use Mod-Podge and fabric to cover them. The fabric was left over from a quilt I never finished started and the colors were perfect for fall. I bought some silk leaves and hot glued them between the layers. The toppers were left over from another project. I filled the pots with rocks and stuffed them with hay. They are under a covered porch, but I still might spray them with a protective finish.

Each topiary cost less than $5.00. But, best of all, they are done!
Linking to these great parties:
Tip Junkie handmade projectsThe Shabby NestUndertheTableandDreamingPhotobucket
Monday Amaze Me Mon, Craftastic Mon, Craft-O-Manic Mon, Homemaker Mon, Inspire Me Mon, Link Party Mon, Mad Skills, Mad Skills Mon, Made By You Mon, Made With Love Mon, Make Something Mon, Making Mon Marvelous, Making the World Cuter, Market Yourself Mon, Marvelous Mess Mon, Masterpiece Mon, Metamorphosis Mon, Motivate Me Mon, Blog Party, Project Parade, Share Mon, Thrifty Décor Chick, Unwasted Homemaking, Craft Catwalk, Craftaholics Anonyomous Tuesday All Thingz Related, Anti Procrastination Tues, Get Your Craft On, Handmade Tues, Home Stories A to Z, It’s Sew Fun, maze Me August, Power Of Paint, Show Me What You Got, Sizzle into Summer, Take A Look Tues, Teriffic Under Ten Tues, Time To Shine,Tip Me Tuesday, Too Cute Tues, Tues Time Out, Tuesday Trash 2 Treasure, Tuesday’s Treasures, Tutorial Tuesday, Who’s Got Glam? Wednesday Anything Goes, DIY Under $5, Hoo’s Got Talent?, Idea Sharing Wed, Linkin’ with Luna, Look What I Made, Penny Pinching Party, Primp Your Stuff Wed, Show And Share, Show And Tell, We Did It Wed, What I Made Wed, What I Whipped Up Wed, What’s Up Wed, Whatever Goes Wed, Wicked Awesome Wed, Wow Me Wed, Wow Me Wed, Thursday A Crafty Soiree, Creative Juice, Catch A Glimpse Thur, Commercial Break Thursday, Get Your Brag On, Hookin’ UpShare Awesomness Thur, Show Off Your Stuff, Strut Your Stuff ThurCatch as Catch Can, Transformation Thur, Under $100 Linky Party, Friday Delicate Construction, Fantabulous Fri, Feature Your Sassy Sites, Feature Yourself  Fri, Flaunt It FriFree For All Fri, Fri Favorites, Fri Link Party, Frugal Fri, Frugalicious Fri, I’m Lovin’ It Fri, Inspiration Fri, Lovely Crafty Weekend, Remodelaholic Fri, Weekend Wander, Weekend Wrap-Up, Whatcha Got Weekend, Saturday Sat is Crafty Day, Sat Nite Special, Sat Spotlight, Show & Tell Sat, Strut Your Stuff, Summer Lovin’ Sat Soiree, Sunday Just Something I Whipped Up, Nifty Thrifty SunSister Sister Sun, Sun Showcase, Sun Scoop, Think Pink Sun, You’re So Creative

Easy Pumpkin Candle Holders

I picked up a few more candle holders from Dollar Tree to make these cute pumpkin candle holders. All it took was some paint, faces (cut from vinyl), and some green ribbon.
 Quick, easy, and cheap! Less than $5.00 for all three.
Add some candles for some spooky fun!
Linking to these great parties:
Tip Junkie handmade projectsThe Shabby NestUndertheTableandDreamingPhotobucket
Monday Amaze Me Mon, Craftastic Mon, Craft-O-Manic Mon, Homemaker Mon, Inspire Me Mon, Link Party Mon, Mad Skills, Mad Skills Mon, Made By You Mon, Made With Love Mon, Make Something Mon, Making Mon Marvelous, Making the World Cuter, Market Yourself Mon, Marvelous Mess Mon, Masterpiece Mon, Metamorphosis Mon, Motivate Me Mon, Blog Party, Project Parade, Share Mon, Thrifty Décor Chick, Unwasted Homemaking, Craft Catwalk, Craftaholics Anonyomous Tuesday All Thingz Related, Anti Procrastination Tues, Get Your Craft On, Handmade Tues, Home Stories A to Z, It’s Sew Fun, maze Me August, Power Of Paint, Show Me What You Got, Sizzle into Summer, Take A Look Tues, Teriffic Under Ten Tues, Time To Shine,Tip Me Tuesday, Too Cute Tues, Tues Time Out, Tuesday Trash 2 Treasure, Tuesday’s Treasures, Tutorial Tuesday, Who’s Got Glam? Wednesday Anything Goes, DIY Under $5, Hoo’s Got Talent?, Idea Sharing Wed, Linkin’ with Luna, Look What I Made, Penny Pinching Party, Primp Your Stuff Wed, Show And Share, Show And Tell, We Did It Wed, What I Made Wed, What I Whipped Up Wed, What’s Up Wed, Whatever Goes Wed, Wicked Awesome Wed, Wow Me Wed, Wow Me Wed, Thursday A Crafty Soiree, Creative Juice, Catch A Glimpse Thur, Commercial Break Thursday, Get Your Brag On, Hookin’ UpShare Awesomness Thur, Show Off Your Stuff, Strut Your Stuff ThurCatch as Catch Can, Transformation Thur, Under $100 Linky Party, Friday Delicate Construction, Fantabulous Fri, Feature Your Sassy Sites, Feature Yourself  Fri, Flaunt It FriFree For All Fri, Fri Favorites, Fri Link Party, Frugal Fri, Frugalicious Fri, I’m Lovin’ It Fri, Inspiration Fri, Lovely Crafty Weekend, Remodelaholic Fri, Weekend Wander, Weekend Wrap-Up, Whatcha Got Weekend, Saturday Sat is Crafty Day, Sat Nite Special, Sat Spotlight, Show & Tell Sat, Strut Your Stuff, Summer Lovin’ Sat Soiree, Sunday Just Something I Whipped Up, Nifty Thrifty SunSister Sister Sun, Sun Showcase, Sun Scoop, Think Pink Sun, You’re So Creative