Earlier this week, I showed how to make a spider web garland with freezer paper. Now, I want to show how to create the opposite look using the negative spaces of the stencil. This is actually the look I was originally going for, but the other way was a little less time consuming.
The first few steps are exactly the same. Cut off a section of freezer paper about 6″ longer than your spider web (my webs were about 16″ x 9″, so I cut off a section about 22″). Fold the freezer paper in half. Draw or trace the outline of a spider web.
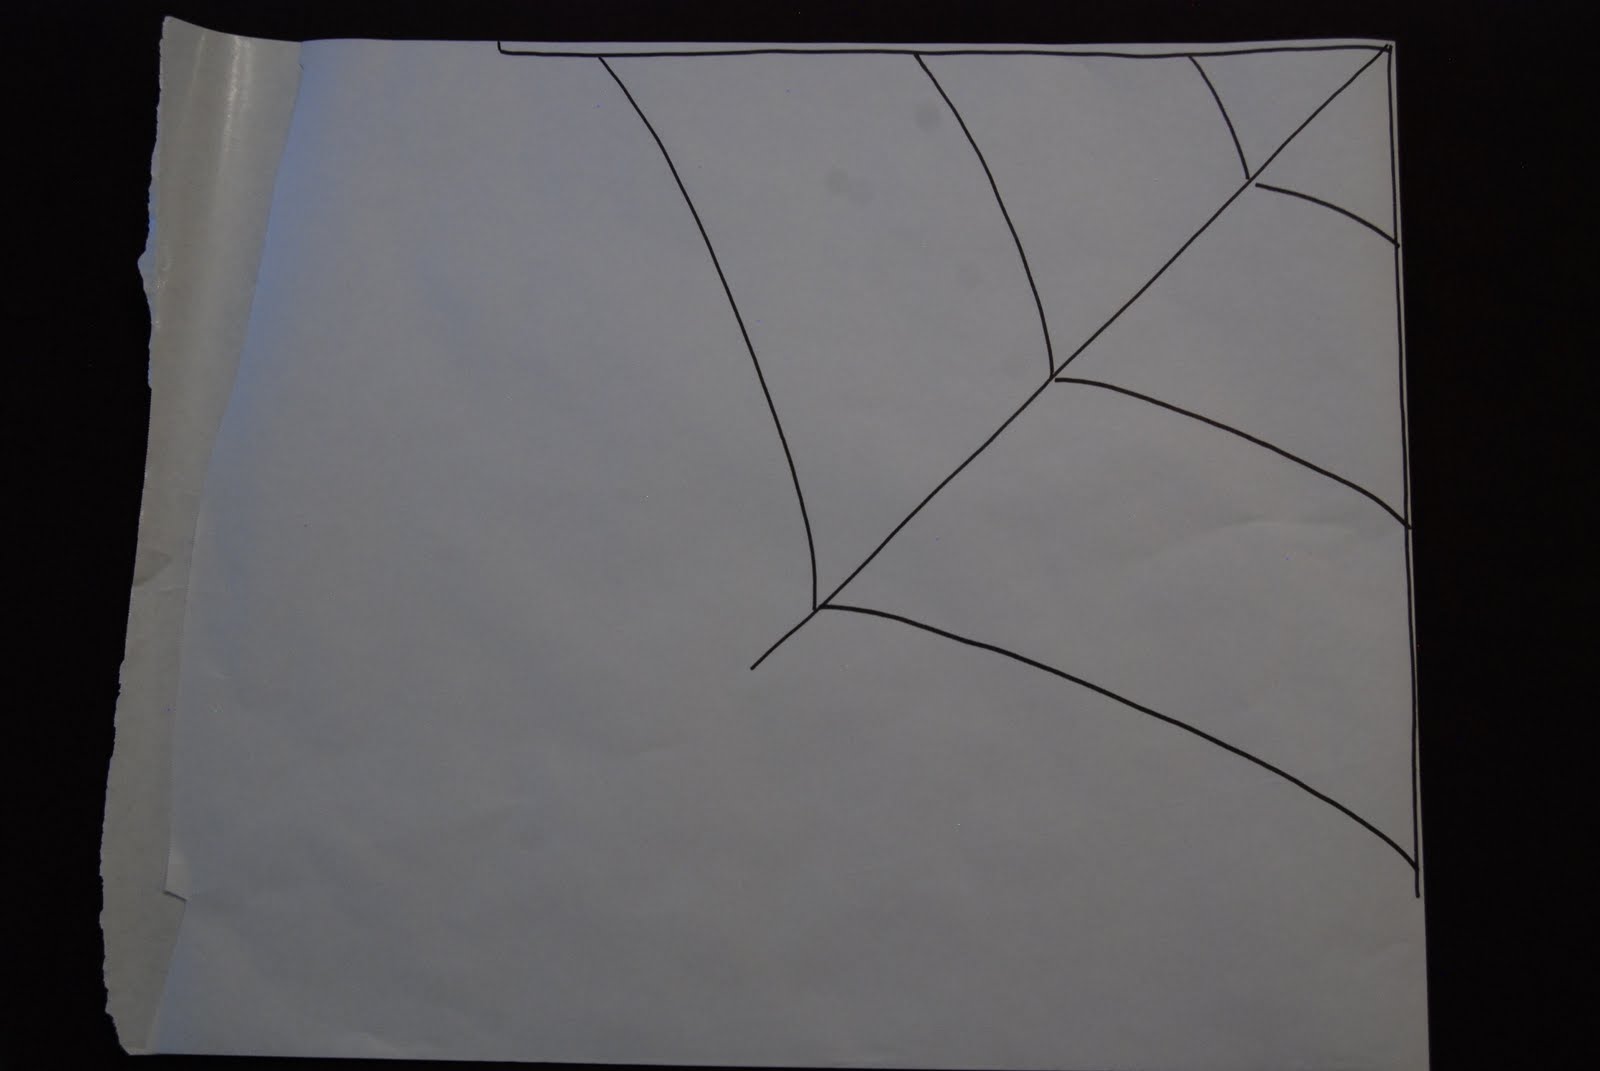
Outline until you get the lines the thickness you want. The line on the fold should be half the thickness of the other lines. Carefully cut out and save the white spaces (these spaces are going to act as the stencil, so you want to avoid cutting through them).

Open it up and lightly iron onto your fabric.

Next, take all the white pieces and put them back in the spaces they were cut out of. Lightly iron them in place.
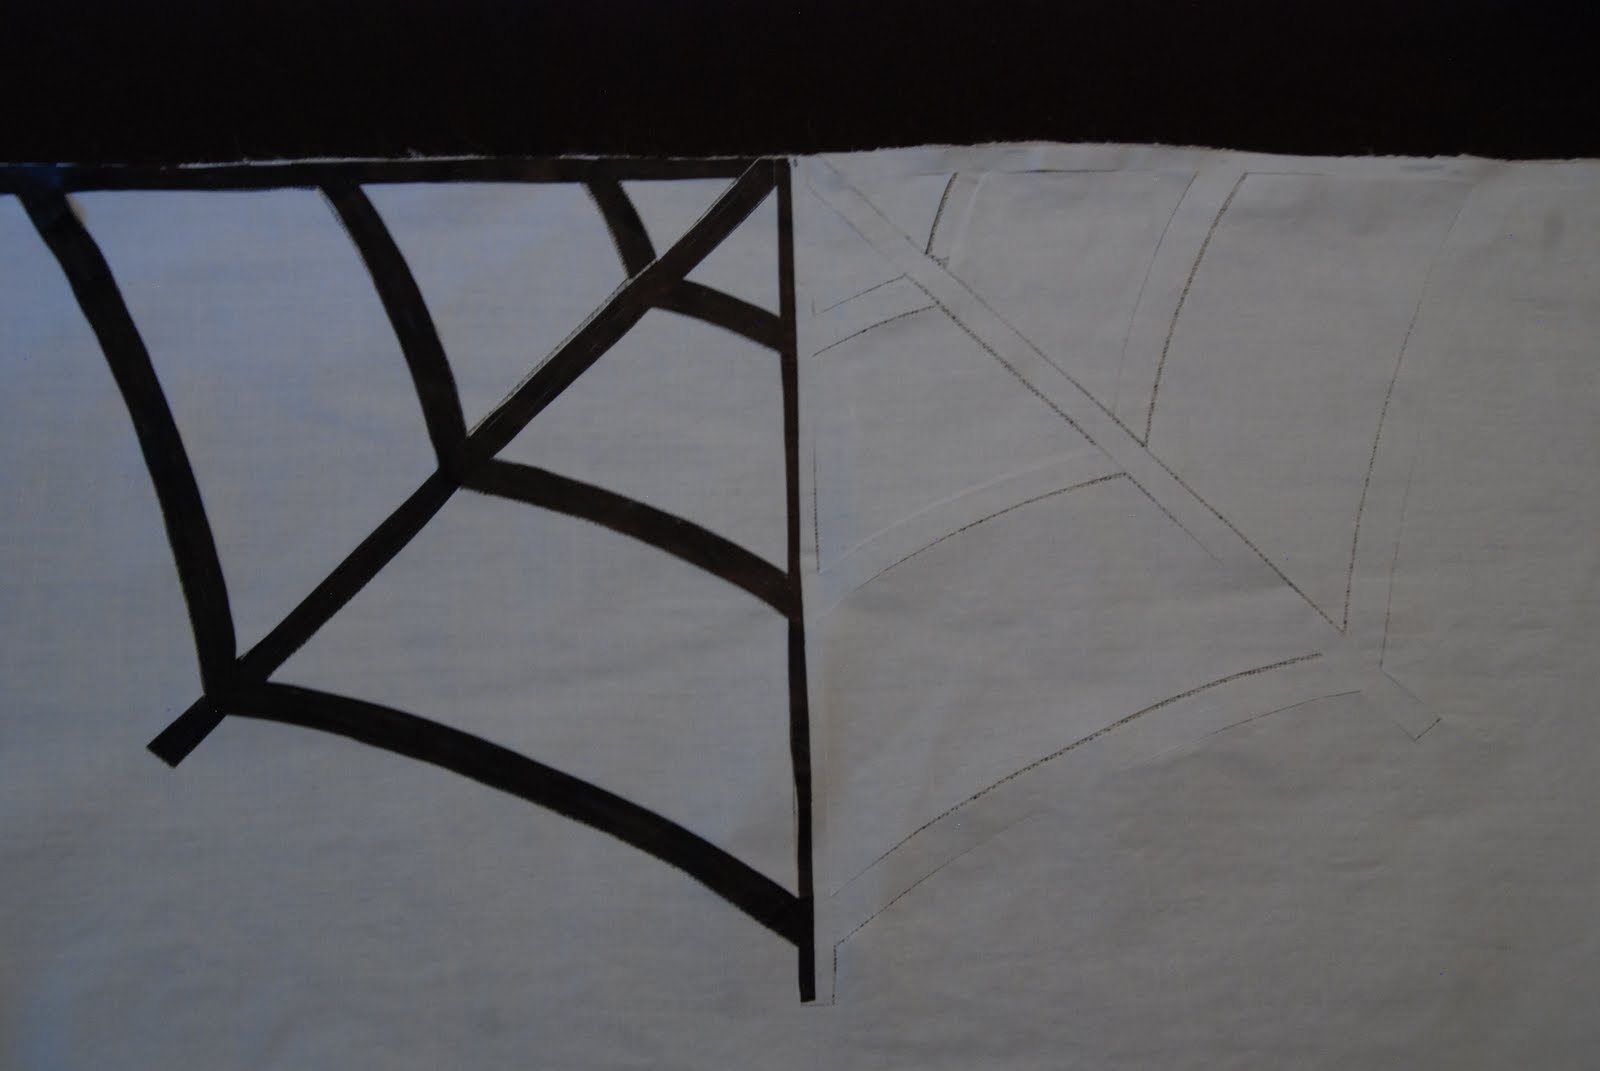
Carefully pull up the web part of the stencil. You should be left with only the negative space of the web. You can now do a more thorough job of ironing the pieces down.

Give it an uneven coat of paint and let dry. Peel off the rest of the freezer paper and cut around the edges to match the shape of the web.

I’m gonna use this technique to make two large webs to hang on our front porch railing. I think they will look super cute with a big stenciled spider crawling on them. I’ll post an update when/if I get that done!

Very creative and a great outcome! Wish I had all the supplies on hand or Id be trying it out myself!
LikeLike
I think this is awesome! Great JOB!!!
We have given you the Versatile Blog Award, come on over to our blog to see what its all about!
Thanks!
Heather & Rose
http://www.SewStylishBoutique.blogspot.com
LikeLike
An offbeat from tradition and formality. Short vintage wedding dress are relatively less considered compared with common cascading ones. Yet there’s always a need to break away from the norm for a little while. Amber’s mermaid wedding dresses favor you an untilled land to show off your talent and philosophy.
LikeLike